|
<< Click to Display Table of Contents >> Setting up a new Simulation |
  
|
|
<< Click to Display Table of Contents >> Setting up a new Simulation |
  
|
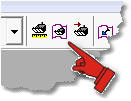
To set up a new Simulation click on the Simulation Settings Toolbar button:

Simulation Settings Toolbar button
Note: A Terrain Window must be active in order for this Toolbar button to be enabled. If it is disabled click on a Terrain Window to make it active.
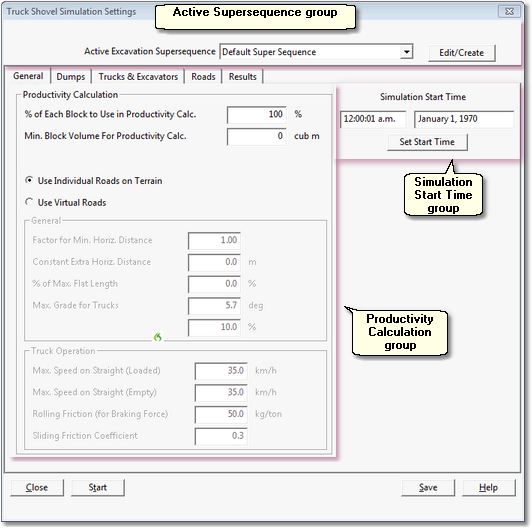
This opens up the Truck and Shovel Simulation Settings dialog:

Truck and Shovel Simulation Settings dialog
At the very top of the Simulation dialog is the Active Supersequence Group.3d-DigPlus file can contain only one Simulation. This Simulation can span strips and pits and can include multiple equipment fleets. If several different simulation set ups are required a 3d-DigPlus file is created for each required simulation.
A Simulation runs a Supersequence. Each block in the Supersequence is excavated, dump and the Excavator and Truck fleet simulated and productivity determined. The Supersequence to be run is selected in the Active Excavation Supersequence pulldown list at in the Active Supersequence Group. To the right of this pulldown is a button labelled Edit/Create, this button provide shortcut access to the Supersequence Editor.
The right-hand column of the Simulation dialog includes the Simulation Start Time group. This group includes a button labelled Set Start Time clicking this button allows the date and time of the start of simulation to be input, once input this date and time will be displayed in the Simulation Start Time fields.
The left-hand column of the Simulation dialog contains the Productivity Calculation group. At the top of this group are two fields which control the rate of sampling of volume used for productivity calculation. By default 3d-DigPlus simulates every truck load of material for every block in the simulation. This very high sampling can be demanding on both calculation time and memory. Short to medium term schedules, even for a very large operation, can usually be efficiently simulated with these default settings. if a highly detailed and very long term schedule is to be simulated the default rate of sampling may need to be altered. This is controlled by two fields:
% of Each Block to be used in Productivity Calculation. This parameter controls the volume material to be used for simulation. The percent of material specified will be fully simulated and the balance will have a productivity assigned based on the average productivity for the sample volume..
Min. Block Volume for Productivity Calculation. This parameter places the lower bound limit on the sample volume used. If a particular block contains a small volume to begin with the sample volume could be very small and incapable of producing a representative productivity. The sample volume used the productivity calculation is the minimum of the Blocks' volume multiplied by the % of Each Block to be used in Productivity Calculation parameter and the Min. Block Volume for Productivity Calculation. If the Blocks' volume is less than the Min. Block Volume for Productivity Calculation, then the full Block volume is useful productivity calculation.
The Productivity Calculation group includes radio buttons for selecting the method for simulating Roads. The two options are:
•Use Individual Roads on Terrain. This is the default setting and the most commonly used method of modelling roads. When this option is selected the user assigns Roads to Subsequences. This assignment is conducted on the Roads page of the Simulation Settings dialog, explained in a following topic.
•Use Virtual Roads. When this option is selected the entire road system used to connect excavation central in two dumps central in is calculated using the process of Virtual Roads. The Virtual Roads option has a list of parameters in the field below the radio button which control the design and functioning of the Virtual Roads. Virtual Roads, nd their parameters, are fully explained in the topic Virtual Roads and Manifolds.