|
<< Click to Display Table of Contents >> Creating Basic Single-Branch Supersequences |
  
|
|
<< Click to Display Table of Contents >> Creating Basic Single-Branch Supersequences |
|
The simplest form of Supersequences have a single branch consisting of a string of Subsequences. The following topic demonstrates how to create such Supersequence to excavate strip 3 of the sample strip described in the previous topic.
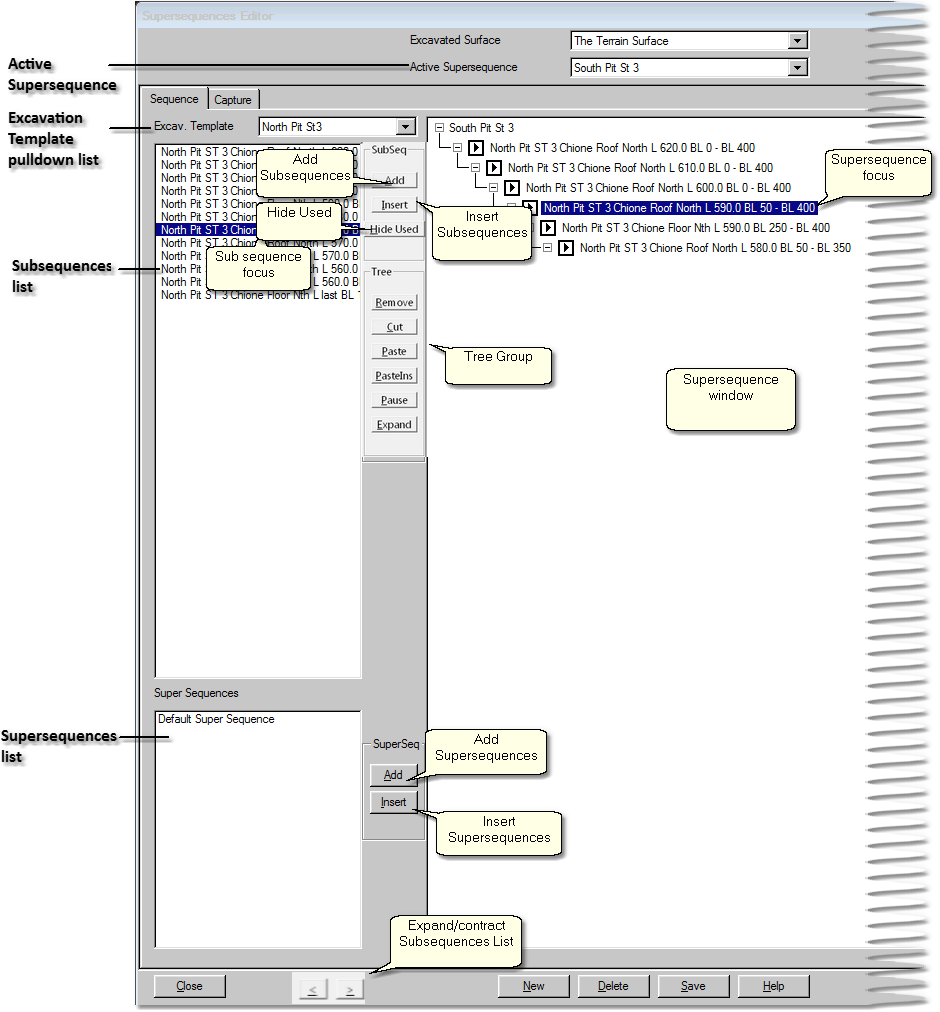
The first step is to create a new Supersequence using 3d-DigPlus's the Supersequence Editor. From the main menu select Excavate/Excavation Supersequences. This will open the Supersequence Editor Sequence page which is shown in the following figure (click on this figure to toggle a larger version):
 .
.
Supersequence Editor contains the following components:
Active Supersequence pulldown list. This pulldown list contains all Supersequences that exist in the current 3d-DigPlus file. The currently selected Active Supersequence is the one will be the subject of the Supersequence Editor.
Excavation Template pulldown list. This pulldown list contains all excavation templates that exist in the current 3d-DigPlus file.
Subsequences List. If the Excavation Template selected in the pulldown list contains a staged excavation with Subsequences these Subsequences will appear in order in the Subsequences List.
Subsequence Focus. The Subsequence Focus is the currently selected Subsequence. Any Subsequence can be selected by pointing and left clicking. The selected Subsequence will be the subject of any relevant buttons in the Supersequence Editor.
Supersequence Window. The Supersequence Window is the area where the Active Supersequence will appear.
Supersequence Focus. The Supersequence in the Supersequence Window which is currently selected is the focus of future action. Any Subsequence in the Supersequence Window can be selected by pointing and left clicking.
Supersequence Level. Each Subsequence in a Supersequence is located at a Level. Each new Subsequence which is added is placed at the level below the previous Subsequence
Add Subsequences. Clicking the Add Subsequences button will add a Subsequence which is currently selected in the Subsequences List to the Active Supersequence. If the focus in the Supersequence window is on the lowest level Subsequence (i.e. the Subsequence at the bottom of the list) the newly added Subsequence will be added at the level lower. If the focus in the Supersequence window is on a Supersequence part way down the list a new branch will be inserted at this level and the newly added Subsequence will be added to the top of this branch.
Insert Subsequences. Insert Subsequences will insert the Subsequence which is currently the focus in the Subsequence list below the level of the focus in the Active Supersequence.
Hide Used (Subsequences) This button hides all Subsequences in the Subsequences List which have already been placed into the current Supersequence. It assists in avoiding duplicate and unused Subsequences.
Tree Group. the Tree Group is a group of buttons for manipulating the Active Supersequence. It consists of the following buttons:
Remove. Clicking the Remove button removes the Subsequence which is currently the focus in the Active Supersequence.
Cut. Clicking the Cut button cuts out all Subsequences in the Active Supersequence at the level of the focus, and all Subsequences in the branch below. Cut Subsequences are stored in the clipboard
Paste. Clicking the Paste button pastes all Subsequences in the clipboard. The position and manner in which these Subsequences are added follow the same rules as for the Add Subsequences button.
Paste Ins. Clicking the Paste button pastes all Subsequences in the clipboard. These Subsequences are inserted after the selected Subsequence. The inserted Subsequences displace the Subsequences which were located after the selected Subsequence.
Pause. Clicking the Pause button inserts a Pause Point into the Supersequence at the current focus point. Pause Points are indicated by pause mark at that level in the Supersequence. This causes the Supersequence to pause during Excavate/Start Supersequence and Simulate/Run Supersequence operations.
Expand. See Creating Compound Supersequences.
Supersequences List. This list contains all the Supersequences in the current 3d-DigPlus file.
Add Supersequence and Insert Supersequence. These two buttons add or insert Supersequences into the Active Supersequence in the same manner as the Add and Insert Subsequences buttons described above. Where Supersequences appear in this list they are subject to a focus the same as that described above for the Subsequences List.
Expand/Contract Subsequences List. These two buttons allow the Subsequences list portion of the window to be widened or narrowed. As Supersequences can become very large is often necessary to maximise the size of the Supersequences section of this window. However this is at the expense of the Subsequences list and if this list becomes too narrow the Subsequence as may become illegible. Using the Expand/Contract buttons allows the user to expand of the Subsequences list when required and to contract this list to better display the Supersequences when this is required.
New. Creates a new Supersequence.
Save. Saves the Active Supersequence.
The Supersequence Editor window has a tab labelled Capture, clicking this opens the Capture page:
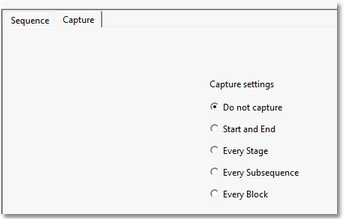
The capture options are:
Do not capture. No image capture is conducted.
Start and End. A picture is captured at the start of the Supersequence and a second picture is captured on completion of the Supersequence.
Every Stage. A picture is captured at the start of the Supersequence and on completion of each Level in the Supersequence.
Every Subsequence. A picture is captured at the start completion of every Subsequence.
Every Block. Picture is captured after completion of every Block (Step).
The Procedure for creating the single branch Supersequence is as follows:
•Open the Supersequence editor.
•Click the New button to create a new Supersequence, give it a suitable descriptive name.
•Select the appropriate Excavation Template from the Excavation Template pulldown list.
•Click on the first Subsequence in the Subsequence list to select it and make it the focus.
•Click the Add Subsequences button. The selected Subsequence will be added to the Supersequence. The focus (selected Subsequence) in the Subsequence list will jump down to the next Subsequence in the list. The focus in the Supersequence window will move to newly added Subsequence. As a consequence of this behaviour repeatedly clicking the Add Subsequence button will transfer Subsequences from the Subsequences list to the Supersequence in order.
The following video clip demonstrates Supersequence creation using the sample pit described above. In this clip a Supersequence for Strip 3 is created. This Supersequence is designed to sequentially excavate all lifts and passes in Strip 3:
The following video clip shows the above Supersequence executed using Excavate/Start Supersequence: